21st Century Take Aways
Technology is a necessary component of 21st century learners.
* Students need to be taught how to use technology
The following link will take you to my Emaze presentation on my take aways from the course.
https://www.emaze.com/@AOCOWWCWL/21st-century-learning
Sunday, February 24, 2019
Sunday, February 17, 2019
Digital Learning tool #4
Digital Learning tool #4 Screen Casting
I decided to explore an IOS app that I have never heard of- Explain Everything. There is a reason I have never heard of it! I do NOT recommend this app.
TO START-
I went on the IOS app store! The app was free- WOOHOO...but the free app is a very small demo version. I created a complete mini lesson that was five minutes long, and I had to delete it because I can only save videos one minute or less. There are many free screen casting tools so I would not pay to use this because it is CONFUSING!
It looked easy! I just created new! Then I chose a template and was so excited to teach my little lesson.

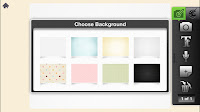
The tool Bar
It looked fairly simple! I selected the top right button and added an image of the food chain! I then clicked the record starting talking and wanted to use the laser pointer, which is the third button from the bottom, and switch to the colored pens. However, it is not very simple to use and there is confusion when trying to switch tools where as Show me and other screen casting tools are easier I think! It could be more user friendly! I practiced adding text and other voice memos into the picture as well. I just think it needs to have a better tool bar.


Here is the video to my VERY short overview since I was not able to save my full lesson!

This is not an App I would pay for after the demo version, I will not use this screen casting tool in my classroom as it is not as user-friendly as some of the others I have used, or would want my students to use.
I decided to explore an IOS app that I have never heard of- Explain Everything. There is a reason I have never heard of it! I do NOT recommend this app.
TO START-
I went on the IOS app store! The app was free- WOOHOO...but the free app is a very small demo version. I created a complete mini lesson that was five minutes long, and I had to delete it because I can only save videos one minute or less. There are many free screen casting tools so I would not pay to use this because it is CONFUSING!
It looked easy! I just created new! Then I chose a template and was so excited to teach my little lesson.

The tool Bar
It looked fairly simple! I selected the top right button and added an image of the food chain! I then clicked the record starting talking and wanted to use the laser pointer, which is the third button from the bottom, and switch to the colored pens. However, it is not very simple to use and there is confusion when trying to switch tools where as Show me and other screen casting tools are easier I think! It could be more user friendly! I practiced adding text and other voice memos into the picture as well. I just think it needs to have a better tool bar.


Here is the video to my VERY short overview since I was not able to save my full lesson!
This is not an App I would pay for after the demo version, I will not use this screen casting tool in my classroom as it is not as user-friendly as some of the others I have used, or would want my students to use.
Sunday, February 10, 2019
Digital Learning tool #3 Infographic
For this inforgraphic, I created a teacher about me page. I used the website Piktochart. I have found that the site offers templates or blank. I started with a template, but I then cleared it so I can add features and make it my own. I think the site is easy to use, but it takes awhile to figure out. This took me a few hours to perfect, and I do not think I would want my students using this, maybe higher level education would benefit. I do know I will use this to site in the future to create newsletter information, flyers, and other papers to send home or post in my classroom. It is great for Professional use. I created an all about me page that I would send before school starts and have my students create a simple print out about me page so we can get to know one another.
Directions:
Begin by selecting which infographic page you will use.
*To add pictures, click on the upload and you can add either select theirs or one of your own photos. Once uploaded the photo will need to be resized and placed in the correct spot this takes some time as you can upload one at a time. ( I used both my own and piktochart photos)

*To add text, select add text and just type, there is a tool bar to change the shape of your text box too, and add shapes and lines to divide the page into sections.
*You can also add a link if viewing on a webpage, and it can take you to other places. (I added it to my school webpage)

Here is my link:
Miss Werner

Thursday, January 24, 2019
Digital Learning tool #2
Digital learning tool #2- Storytelling
As a teacher in the primary grades, story telling and recalling events is an important aspect in the English Language Arts Common Core curriculum. I choose to review the IOS app Life Story Creator. The app needs downloaded. The screen comes up, and it allows you to click the plus sign to add a story. When in the app, you can add your own photos and then type or use the microphone to tell the story. I think this app is fantastic for about grades 2 and up! I will use this app in my future class. The tool bar is small and very user friendly. The students click the camera it opens photos and they select it. Then they click the T to type their text, or the microphone. When the story is finished, they click done, and then save as PDF and it goes in their drive.

I created a story about my summer job, after the story is complete, you can save it as a PDF and upload it to google drive. I think this would be a great ice breaker activity and write a summer story!
Sharable link to my story
As a teacher in the primary grades, story telling and recalling events is an important aspect in the English Language Arts Common Core curriculum. I choose to review the IOS app Life Story Creator. The app needs downloaded. The screen comes up, and it allows you to click the plus sign to add a story. When in the app, you can add your own photos and then type or use the microphone to tell the story. I think this app is fantastic for about grades 2 and up! I will use this app in my future class. The tool bar is small and very user friendly. The students click the camera it opens photos and they select it. Then they click the T to type their text, or the microphone. When the story is finished, they click done, and then save as PDF and it goes in their drive.

Sharable link to my story
Sunday, January 13, 2019
Digital learning tool #1- Audio
 If You Give a Mouse a Brownie Link to my vocaroo
I choose to use the chrome app Vocaroo. This tool is something I look forward to using in my classroom. I choose to record myself reading a story, and then the students can follow along. If a student is visually impaired this can help them as they can replay the teacher's voice This app can be used for a variety of reasons though. Students can create their own stories, and not be afraid as it is just their voice. My favorite part, you can download it as a QR code and have your students scan it on their own device.
 It is extremely user friendly:

Step one: Type Vocaroo into the web browser ( Make sure microphone is enabled on your computer)
Step two: Click begin recording and record then click stop recording
Step three: Listen to your recording
Step four: Save recording and then email or embed the link or
THAT IS IT!

Subscribe to:
Posts (Atom)